You've recorded an amazing run, bike ride, or hike with Strava and now want to use it elsewhere? Maybe you want to transfer the route to another GPS device, share it with friends, or create a personalized poster from it. For this, you need the GPX file of your activity.
In this guide, we'll show you step by step how to export your Strava activities as GPX files – both on desktop and via the mobile app.
What is a GPX File?
GPX stands for GPS Exchange Format and is a standardized file format for GPS data. A GPX file contains:
- Waypoints (coordinates along your route)
- Tracks (the recorded path)
- Timestamps (when you were where)
- Elevation data
The format is universally readable and can be processed by almost all GPS applications, navigation devices, and mapping services.
Method 1: GPX Export via Strava Website (Desktop)
The easiest way to export a GPX file is through the Strava website on your computer.
Step 1: Log into Strava
Open strava.com in your browser and log in with your account.
Step 2: Select Activity
Navigate to the activity you want to export. You can find your activities under:
- Dashboard → Click on an activity
- Profile → Activities → Select the desired activity
[Screenshot: Strava activity overview with highlighted activity]
Step 3: Open Three-Dot Menu
On the activity page, you'll find a three-dot menu (⋯) on the left below the title. Click on it to display more options.
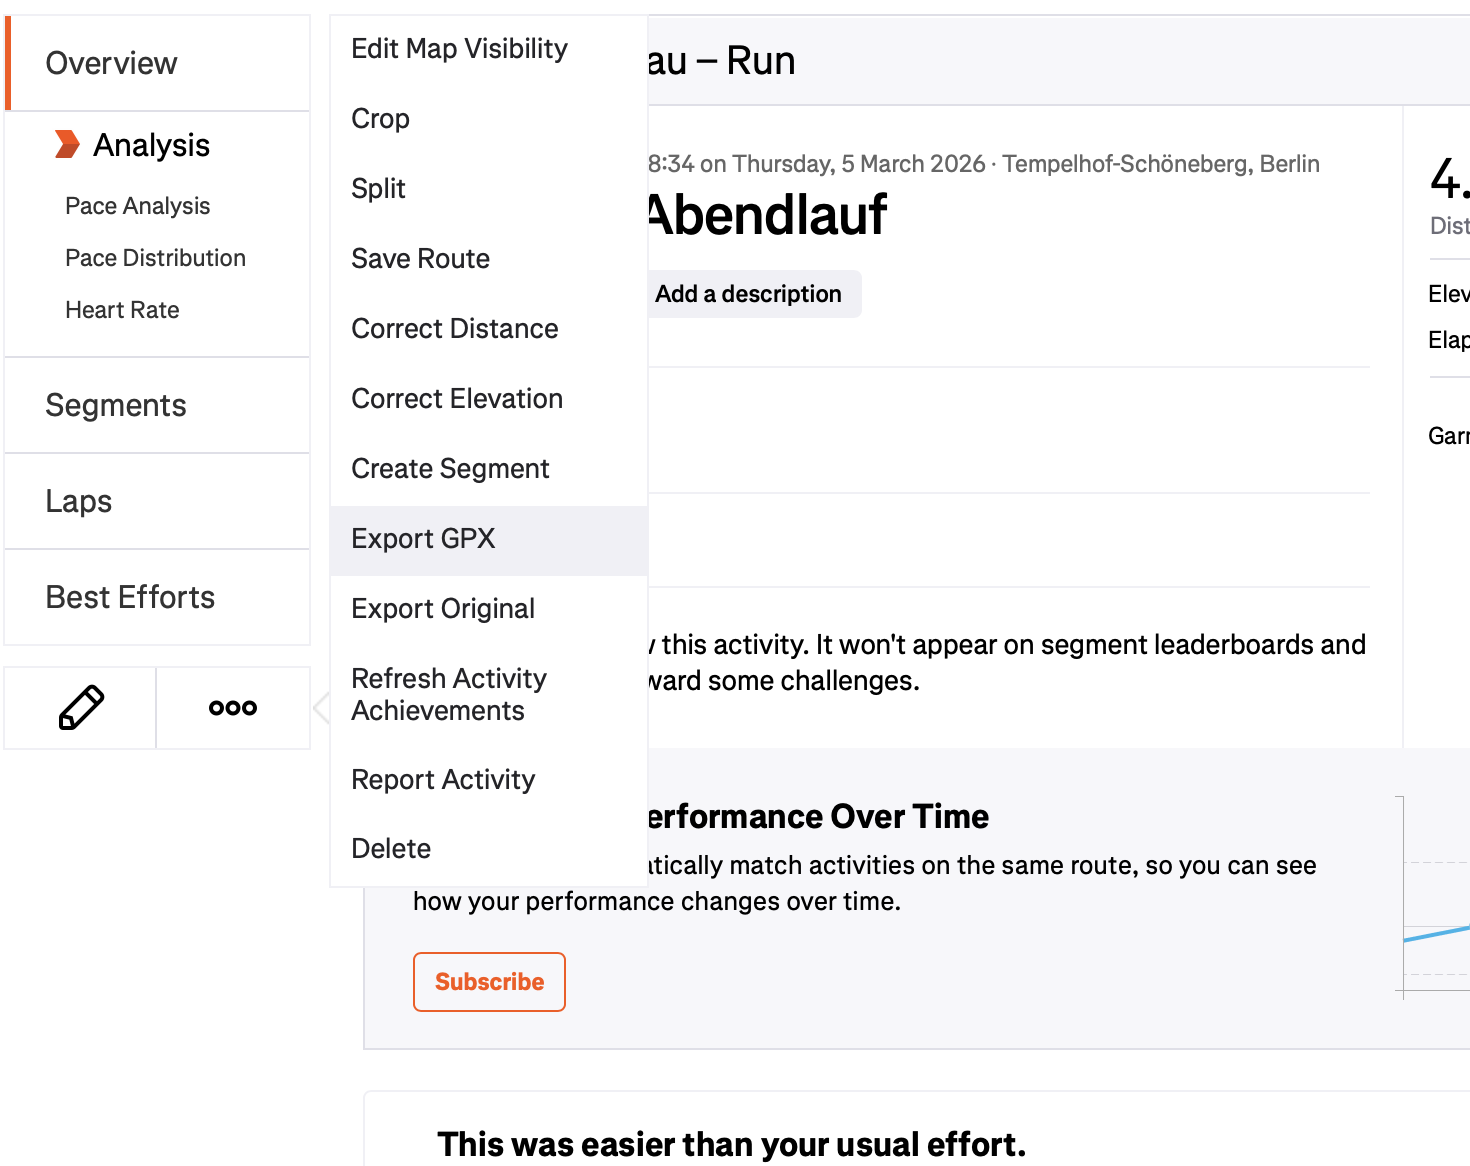
Step 4: Select "Export GPX"
In the dropdown menu, you'll find the option "Export GPX". Click on it, and the GPX file will be downloaded automatically.
The file will be saved in your default download folder with the activity name (e.g., Morning_Run.gpx).
Method 2: GPX Export via Strava App (Mobile)
You can also export GPX files through the Strava app on your smartphone.
Step 1: Open App and Select Activity
Open the Strava app and navigate to the activity you want to export. You can find it under "You" → "Activities".
Step 2: Tap Three-Dot Menu
On the activity page, tap the three-dot symbol in the top right corner (⋮ on Android, ⋯ on iOS).
Step 3: Choose "Export GPX"
Scroll down in the menu and tap "Export GPX". The app will ask you how you want to share or save the file.
[Screenshot: Strava App menu with "Export GPX" option]
Step 4: Save or Share File
Choose one of the following options:
- Save to Files (iOS) or Downloads (Android)
- Send via Email (to yourself)
- Save to Cloud (Google Drive, Dropbox, iCloud)
Common Problems and Solutions
Problem: "Export GPX" Option is Missing
If you don't see the export option, it could be due to the following reasons:
- Activity is private: Some private activities can only be exported by the creator.
- Activity was manually created: Manually entered activities without GPS data cannot be exported as GPX.
- You're not the creator: You can only export your own activities.
Problem: GPX File is Empty or Corrupted
Try the following solutions:
- Reload the page and try the export again
- Try exporting on desktop instead of the app
- Check if the activity actually contains GPS data
Alternative: Bulk Export of All Strava Data
If you want to export all your activities at once, Strava offers a bulk export:
- Go to strava.com/settings/profile
- Scroll down to "Download Your Data"
- Click on "Request Your Archive"
- You'll receive an email with a download link (may take a few hours)
The bulk export contains all your activities as individual GPX files in a ZIP archive.
What Can You Do with the GPX File?
After exporting your GPX file, you have many options:
- Transfer route to a GPS device (Garmin, Wahoo, etc.)
- Import route into other apps (Komoot, Google Maps, etc.)
- Share route with friends
- Analyze route (elevation profile, speed, etc.)
- Create a personalized poster
Your Route as Artwork
With your exported GPX file, you can create a unique poster at Track To Print. Transform your favorite route into a high-quality map artwork for your wall.
The process is simple:
- Export GPX file from Strava (as described above)
- Upload file to Track To Print
- Customize design (colors, style, text)
- Order poster or receive as download
Upload your GPX file and create a poster now
Conclusion
Exporting a GPX file from Strava takes just a few clicks – both on desktop and mobile. With the exported file, you have full control over your route data and can use it in many different ways.
Have questions about GPX export or want to turn your route into a poster? We're happy to help!